
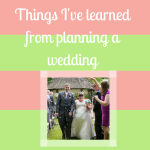
Every bride wants to look her best on her wedding day, and this usually means having bridal hair and makeup done. There was no question about getting my hair done – by my usual hairdresser. As for the wedding makeup, I had no idea whether I wanted to DIY or book a makeup artist. I wanted to look like a magical princess but I also hate when you get your makeup done at a makeup counter and you come out looking as though you are wearing an inch of makeup.
I had a look around and found a wedding make up artist in my area, but a trial and just my wedding makeup would set me back £205. Add in my bridesmaids and flower girl, I would be looking at a whopping £505. Whilst we were already spending a lot of money on this wedding, I was unhappy spending £505 on makeup.
The first solution was to look for a cheaper makeup artist, but with other wedding preparations taking up the majority of my time, I decided that I was going to try to do my wedding makeup myself. I would trial the wedding makeup with enough time to find another makeup artist if everything went wrong.
I turned to YouTube, watched all of two bridal makeup videos and I created a hybrid look from both of the videos.
Shopping
The first thing that I needed to get was a stippling brush. I had tried the MAC 188 brush years ago and I just didn’t get it. I ordered the Real Techniques stippling brush for just £7.24 on Amazon. Turns out I had completely the wrong foundation for it. Cue the search for a suitable foundation. The bridal make up videos both used MAC’s face and body foundation, which I bought on eBay for a little bit cheaper than buying in store. I tried with it, but it just didn’t work. The foundation is really liquid-y and did nothing for me – no coverage and no smoothing. My regular foundation, MAC’s studio sculpt gel didn’t feel right either. This time I knew I had to go in store to buy a foundation, and I thought I would try Boots first.
Here I managed to get Rimmel’s Long Lasting 25 hour foundation for £7.99, plus a 3 for 2 offer, which I used to get the matching long lasting primer (£6.99) and a Rimmel highlighter for £4.99 – for a grand total of £14.98 because of the offer. I tried the foundation the moment we got home and I was completely in love. I don’t know when high street/”drug store” make up got so good, but it is far superior to my (much more expensive) MAC foundation!
The primer didn’t help with the pores on my nose – something I always suffer with! During really bad flares of it, foundation just seems to seep into the pores and look awful, even with primer. Once again I turned to Amazon to save a couple of quid, and I ordered Maybelline’s Baby Skin Pore Eraser, which was perfect!
The only other things left to buy would be a lipstick and lip liner. I visited a MAC store armed with my 6 empty MAC products to claim my free lipstick worth £15.50. An assistant helped me to find a suitable lipstick, but being from the Viva Glam collection, I wasn’t able to claim my lipstick for free. Whilst there I made a snap decision that I wanted to have some pink sheen to my eye make up, so I also grabbed a Kitschmas pigment for £16. I made the mistake of walking through John Lewis to get back to my car, where I found a travel sized Urban Decay All Nighter Makeup Setting Spray for just £9. Considering that my makeup had to last 12 hours, I thought it would be a great product.
The final item that I purchased was a cheap Barry M lip liner for £2.99. I had wanted to purchase an Urban Decay lip liner, but John Lewis were out of stock.
The total that I spent on new products to do my wedding make up was £71.66.
The trials
Armed with my new products alongside my existing makeup collection, I was ready to give my wedding makeup a trial. I carried out 4 trials in total, using these to achieve the exact look that I was after. Seeing the wedding makeup I had done alongside my hair trial sealed the deal for me – I would be DIYing my wedding makeup.

How I achieve the look

Here is a photograph of all the products I used.
- Moisturized with La Roche Posay’s Hydraphase (thanks to Zoey for introducing me to this).
- Primed with Maybelline’s baby skin on my nose and Rimmel’s long lasting primer on the rest of my face.
- Eyes: MAC concealer, two MAC eye shadows, highlighter in the crease, Soap and Glory on the upper lid to the brow. Kitschmas pigment on top. Finished off with Poundland mascara.
- Face: Rimmel foundation, MAC blushes, Rimmel highlighter and Urban Decay spray. Finished off with MAC’s prep and prime translucent powder.
- Lips: MAC’s Viva Glam V lipstick and a Barry M liner.
All done and I was a beautiful princess.
My bridesmaids also DIYed their makeup, and I can only speak for myself when I say that it made me much more relaxed on the wedding morning. I didn’t need to be thinking about yet another person’s whereabouts and I was able to control what I looked like! The substantial money saved has been put into a savings account. I know I could have found a cheaper makeup artist, but the £71.66 I spent also allowed me to keep the products – and discover a much cheaper foundation that I love!
Would you do your wedding makeup?


Blackpepper1 says
I did mine no problem with what I already had and so did my Bridesmaids.I just had my usual hairdresser do my hair and it worked out well. Sounds very expensive to get just make up done so you saved allot by doing it yourself and of course you had some good make up to keep to use again.
Anrola (@anrola99) says
Good post. I don’t have much of a clue when it comes to putting on make-up, but I certainly wouldn’t pay someone to do it for me. Good to see what products you recommend too.
katherine says
for poreless looking skin and long lasting effects ( I work up to 12h daily in corporate makeup), I’ve started using Korean bb cream, such as Missha Signature wrinkle filler, and I have to say that aside tone matching my skin, it’s great, long lasting, flawless looking and it does fill up nicely any small wrinkles around the eye area. You can get it real cheap on ebay or Korean online stores, so worth trying out. And it lasts for ages too